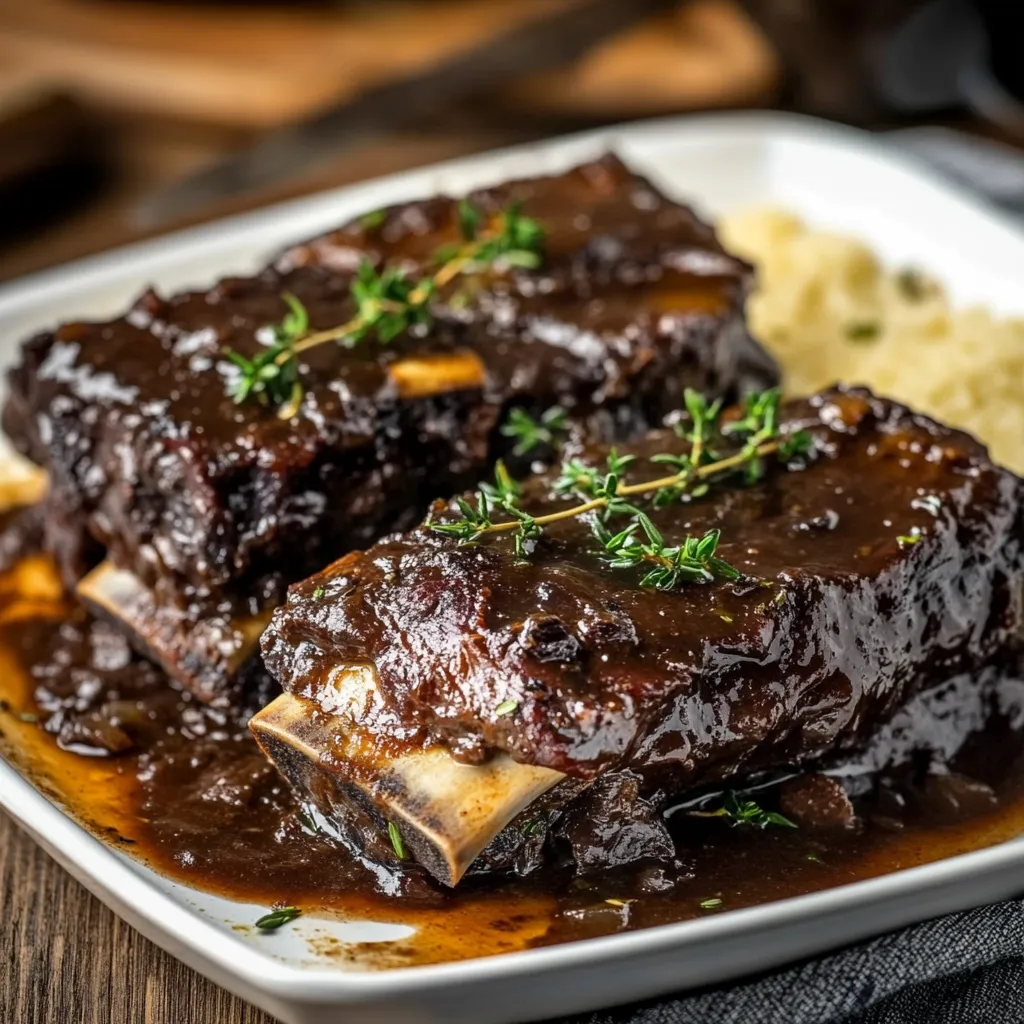
Red wine braised beef short ribs are a true comfort food, perfect for a hearty meal that brings everyone to the table. Slow-cooked until they’re melt-in-your-mouth tender, these ribs are coated in a rich, flavorful sauce that is both deep and velvety. The slow braise, coupled with the acidity and depth of the red wine, results in a dish that’s as elegant as it is satisfying. Whether you’re preparing a special occasion meal or just want to impress family and friends, this recipe is the perfect choice.
The key to great red wine braised beef short ribs is in the details—choosing the right meat, crafting the perfect sauce, and mastering the slow cooking process. This dish might seem complex, but with a bit of patience, you can achieve a restaurant-quality meal right in your kitchen. In this article, we’ll dive deep into every step, from selecting the perfect cut of beef to achieving that rich, glossy sauce that makes the dish unforgettable.
The Importance of Choosing the Right Cut of Beef Short Ribs
Selecting the right cut of beef is crucial for making the best braised beef short ribs. Here’s what you need to know:
Types of Beef Short Ribs:
-
Flanken-Cut Short Ribs: These ribs are cut across the bones, which gives each piece a small section of multiple rib bones. Flanken-cut ribs are often thinner and are typically used for grilling in Korean BBQ. While they can be used in braising, the thinner slabs can sometimes dry out if not cooked carefully.
-
English-Cut Short Ribs: English-cut short ribs are cut such that each piece contains one bone, and the meat sits on top of the bone, creating a thicker cut. This is often the preferred cut for braising, as it holds more meat, which results in a juicier and more tender dish after slow cooking.
For braising, English-cut short ribs are the best option. Look for well-marbled beef, as the fat running through the meat is what will give your ribs their tenderness and rich flavor when braised. The meat should be thick, with at least 1.5 inches of meat above the bone. If you find ribs that have a thick fat cap, that’s perfectly fine—just make sure it isn’t excessive, as too much fat can result in a greasy dish.
How to Choose the Best Short Ribs
-
Look for well-marbled meat with visible fat running through the ribs.
-
Ensure that the meat is thick (at least 1.5 inches of meat above the bone).
-
If using flanken-cut, choose ribs that are about two inches thick to ensure they don’t dry out during braising.
Preparing Beef Short Ribs for Braising
Once you’ve selected the perfect ribs, it’s time to prepare them for braising. Here’s how you should proceed:
-
Season the Meat: Begin by seasoning the short ribs with kosher salt and freshly ground black pepper. Make sure to season generously to enhance the natural flavor of the beef.
-
Searing the Ribs: Searing the ribs is crucial for developing deep flavor. Heat neutral oil (such as vegetable oil) in a large Dutch oven over medium-high heat. Once the oil is hot and shimmering, add the ribs in batches, browning them on all sides. Each side should take about 4 minutes to sear. Once browned, transfer the ribs to a platter and set them aside. This step creates a caramelized crust on the ribs, which imparts richness to the braising liquid.
-
Cooking Aromatics: After the ribs are seared, you can start building the flavor base. Add chopped carrots, celery, onion, and garlic to the same Dutch oven. Cook for about 6 minutes, or until the vegetables are browned. This is the foundation of your braising liquid and will help flavor the beef as it cooks. Stir in a couple of tablespoons of tomato paste and cook for 1 more minute. The tomato paste will add depth and slight sweetness to the sauce.
-
Deglaze with Red Wine: After the vegetables are browned, pour in 750 ml of dry red wine (any dry red wine you enjoy drinking). Scrape up any caramelized bits from the bottom of the pot with a wooden spoon. This step adds even more flavor to your sauce. Let the wine simmer for a few minutes to cook off the alcohol, reducing slightly.
Creating the Perfect Braising Liquid
Now that the beef is seared and the aromatics are cooked, it’s time to craft the perfect braising liquid. The goal is a rich, flavorful liquid that can tenderize the meat while providing a base for the sauce. Here’s how to get it right:
-
Adding the Stock: After the wine has reduced, add beef stock to the Dutch oven. If you’re using homemade stock, you’re in for a treat, as the natural gelatin in homemade stock will thicken the sauce beautifully. If you’re using store-bought stock, consider adding unflavored gelatin to give it the same thickening power.
-
Herbs and Spices: Tie a few sprigs of fresh thyme and bay leaves together with kitchen twine. This herb bundle will infuse the braising liquid with aromatic flavors, which will permeate the meat as it cooks.
-
Returning the Ribs to the Pot: Nestle the browned short ribs into the pot, making sure the meat is submerged in the liquid. Add any juices that have accumulated on the plate as well.
-
Braising: Cover the Dutch oven partially with its lid, leaving a little room for steam to escape. Place the pot in an oven preheated to 300°F (150°C). Braise for 2.5 to 3 hours, or until the meat is fork-tender. During this time, the beef will cook slowly and evenly, breaking down the connective tissues and becoming incredibly tender.
Crafting the Perfect Sauce for Red Wine Braised Beef Short Ribs
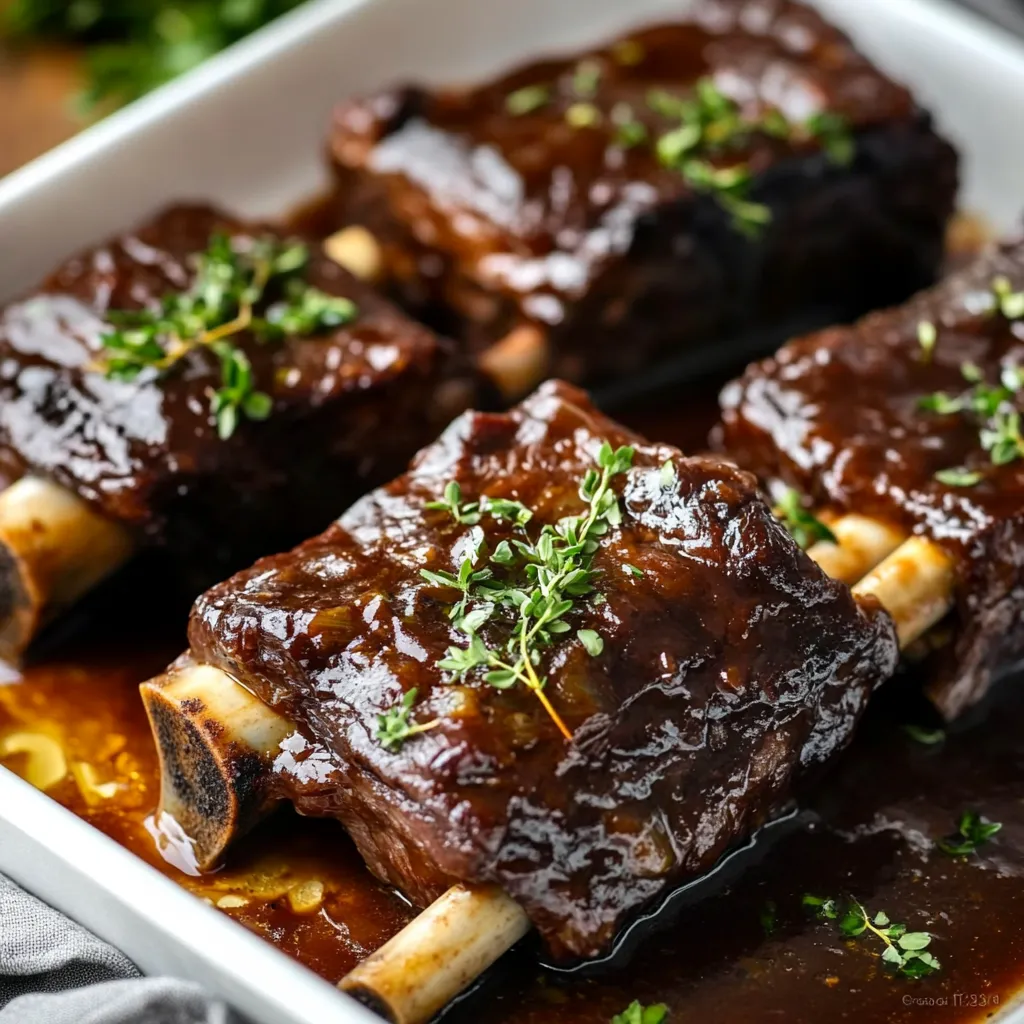
The key to red wine braised beef short ribs is not just in the tenderness of the meat, but in the creation of a rich, glossy sauce that coats the beef and enhances the flavor. Achieving a thick, flavorful sauce that isn’t too harsh, but perfectly balances the acidity of the wine and the richness of the beef, takes a bit of care. Let’s go over the steps needed to get that perfect sauce.
Straining and Reducing the Braising Liquid
After the ribs have finished braising, it’s time to focus on the sauce:
-
Remove the Ribs: Carefully take the short ribs out of the pot. They will be very tender, so use tongs or a spoon to handle them gently. Transfer the ribs to a clean platter and tent them with aluminum foil to keep them warm. You may notice the bones starting to slip out—this is a good sign, as it means the meat is perfectly tender.
-
Strain the Braising Liquid: The next step is to strain the braising liquid. Set a fine-mesh strainer over a large heatproof bowl. Pour the liquid through the strainer to remove the cooked vegetables and herbs. Press down on the vegetables to extract as much flavor as possible, then discard the solids. What you are left with is the flavorful braising liquid that will become your sauce.
-
Skim the Fat: After straining, you will likely see a layer of fat on the surface of the liquid. Use a spoon or a fat separator to skim off any excess fat. Removing this fat is important for achieving a smooth, rich sauce without any greasiness.
-
Reduce the Liquid: Return the strained liquid to the Dutch oven and place it over medium heat. Bring it to a gentle simmer and let it reduce by half, which should take about 1 hour. As the liquid reduces, it will thicken and concentrate in flavor. You want the sauce to be thick enough to coat the back of a spoon but not too thick to the point where it becomes syrupy.
The Secret to a Velvety Smooth Sauce: Port Wine
One of the most important steps in this recipe is the addition of ruby port wine. Reducing the port wine creates a thick syrup that adds a jammy, sweet flavor to the sauce, balancing the acidity of the red wine and rounding out the sharp edges of the braising liquid. Here’s how to use port wine to elevate your sauce:
-
Reduce the Port: Pour 750 ml of ruby port into a small saucepan and bring it to a gentle simmer over low heat. Let it simmer uncovered until the port is reduced to a thick syrup—this should take about 1 hour. Once reduced, the port will become concentrated, with a syrupy consistency.
-
Add the Reduced Port to the Braising Liquid: Stir the reduced port wine into the braising liquid. This addition will deepen the wine flavor and thicken the sauce without overpowering the beef. The result will be a rich, velvety sauce that clings to the meat, making each bite irresistible.
Final Adjustments to the Sauce
At this stage, your sauce will be incredibly flavorful, but you can make a few final adjustments to perfect it:
-
Cornstarch Slurry (Optional): If you feel that the sauce isn’t as thick as you would like, you can add a small amount of cornstarch slurry. Mix 1/2 teaspoon of cornstarch with 1 teaspoon of water and whisk it into the simmering sauce. Stir it in and let it cook for a few minutes until it thickens to your desired consistency. Be cautious not to overdo the cornstarch, as it can make the sauce too thick and give it a slightly slimy texture.
-
Season the Sauce: Taste the sauce and adjust the seasoning as needed. You may want to add a pinch of salt or a dash of black pepper to bring out the full flavor. Some cooks like to add a small splash of red wine vinegar to balance the sweetness of the port and wine, but this is optional depending on your taste.
Glazing the Ribs with Sauce
Now that the sauce is perfect, it’s time to return the short ribs to the pot. This step helps the meat soak up the sauce and ensures it’s glistening with that rich, flavorful glaze.
-
Return the Ribs to the Pot: Place the braised short ribs back into the Dutch oven with the sauce. Spoon the sauce over the meat, ensuring that the ribs are well-coated. Allow them to simmer in the sauce for a few minutes to absorb all the flavors.
-
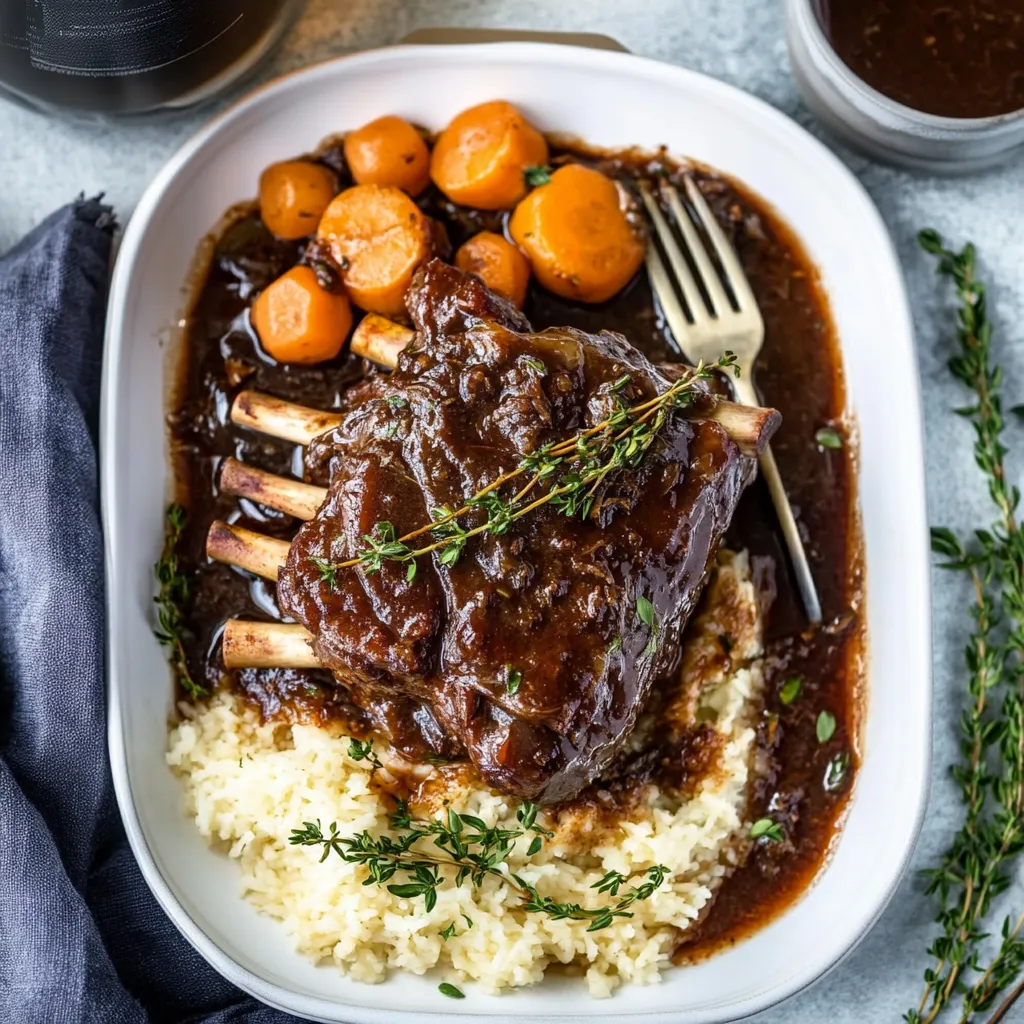
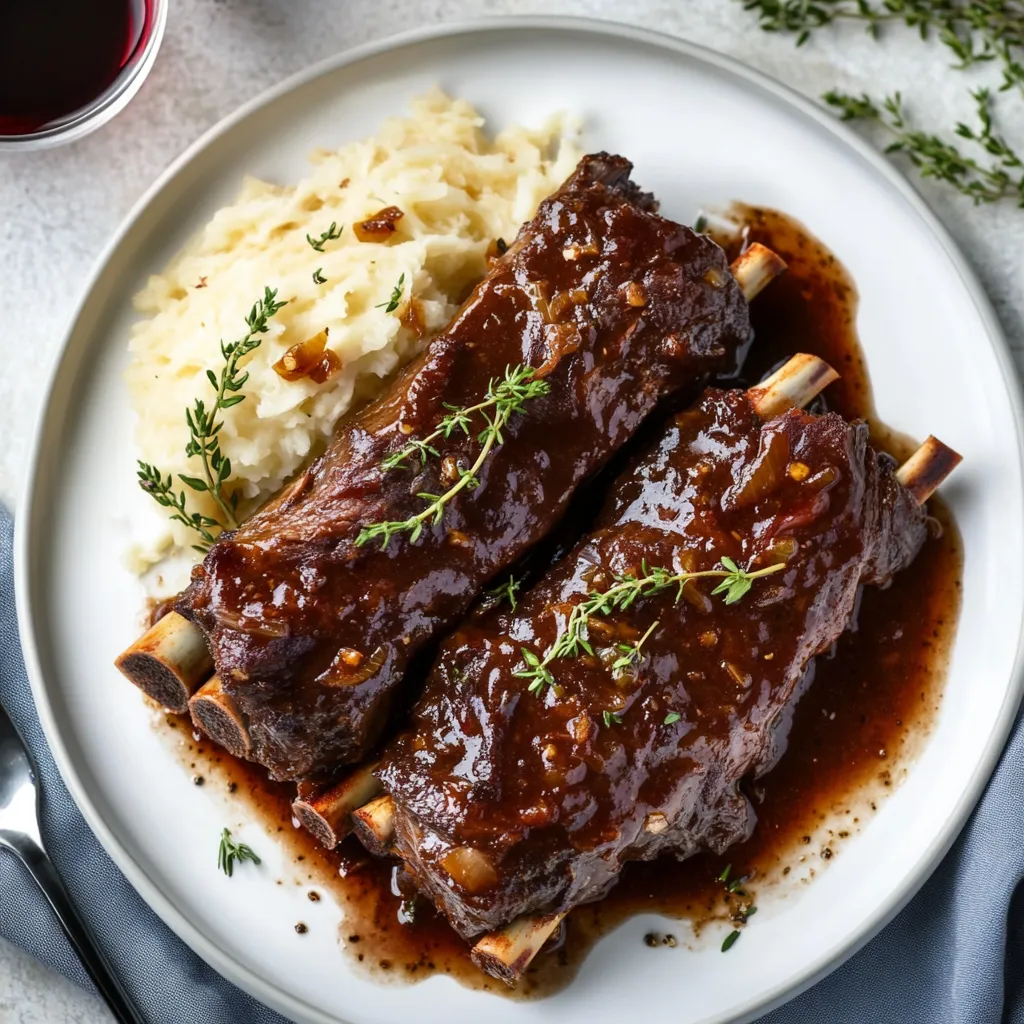
Serve: Your red wine braised beef short ribs are now ready to be served! Plate the ribs with the sauce, making sure to ladle extra sauce over the meat. These ribs pair beautifully with sides that soak up the rich sauce, such as mashed potatoes, polenta, or crusty bread.
Tips for Perfect Red Wine Braised Beef Short Ribs
While this recipe is simple enough to follow, here are a few tips to help you get the most out of your braised beef short ribs:
-
Use Good Wine: The quality of the wine plays a significant role in the flavor of the sauce. Choose a dry red wine that you would enjoy drinking. A Cabernet Sauvignon, Merlot, or Pinot Noir works well in this recipe.
-
Cook Slowly: Braising is a slow process, and while it may take time, this is what makes the beef so tender. Don’t rush the cooking process by increasing the temperature—low and slow is the key.
-
Make-Ahead Option: Braised beef short ribs are great for making ahead. The flavors continue to develop as they sit, so feel free to cook them a day or two in advance. Store the short ribs in the sauce in an airtight container in the fridge for up to 5 days. Reheat gently when ready to serve.
-
Freeze for Later: You can also freeze the braised short ribs for up to 3 months. To reheat, thaw them overnight in the fridge, then gently warm them in a saucepan over low heat, adding a splash of stock or water to loosen the sauce if necessary.
Serving and Storing Red Wine Braised Beef Short Ribs
Now that you’ve created the perfect dish with red wine braised beef short ribs, it’s time to serve and store it properly to ensure that every bite is just as delicious as the first. Here’s everything you need to know for serving and storing your braised short ribs.
Serving Suggestions
To make this dish a complete meal, it’s important to pair your red wine braised beef short ribs with the right sides. You want sides that complement the richness of the beef and the deep flavors of the sauce. Here are some excellent serving options:
-
Mashed Potatoes: Creamy mashed potatoes are the perfect base to soak up all the delicious sauce from the short ribs. The soft texture of the potatoes contrasts beautifully with the rich, tender beef.
-
Polenta: Soft, buttery polenta is another great side dish. It has a slightly sweet flavor that balances the savory richness of the short ribs and provides a perfect base for the sauce.
-
Crusty Bread: A thick slice of crusty bread is ideal for soaking up the sauce. The bread’s texture complements the silky, rich sauce and adds an extra layer of flavor with each bite.
-
Roasted Vegetables: Roasted root vegetables, such as carrots, parsnips, and turnips, bring a natural sweetness that works well with the deep, savory beef. They also add a touch of color to the plate.
-
Pasta: For a more indulgent variation, you can remove the bones from the short ribs and shred the meat. Toss the shredded beef and sauce with freshly cooked tagliatelle or pappardelle pasta for a comforting meal.
Garnishing and Presentation
To elevate the presentation of your red wine braised beef short ribs, consider adding a simple garnish that enhances both the visual appeal and flavor of the dish:
-
Fresh Herbs: A few sprigs of fresh parsley or thyme can add a burst of color and a slight herbal freshness that contrasts beautifully with the rich beef.
-
Shaved Parmesan: If you’ve served the short ribs with pasta, a light dusting of shaved Parmesan adds a savory note that enhances the overall flavor.
-
Olive Oil: A drizzle of extra virgin olive oil over the ribs before serving adds a touch of richness and a glossy finish to the dish.
How to Store Leftovers
One of the best things about red wine braised beef short ribs is that they make amazing leftovers. The flavors tend to deepen and improve after sitting for a day or two. Here’s how to store and reheat your leftovers:
-
Storage: Store the leftover short ribs and sauce in an airtight container in the refrigerator for up to 5 days. Make sure the meat is fully submerged in the sauce to keep it moist.
-
Freezing: If you want to save your leftovers for later, freeze them in an airtight container or heavy-duty freezer bag. They’ll last for up to 3 months in the freezer. When you’re ready to eat them again, simply thaw the short ribs in the refrigerator overnight and reheat gently on the stove.
-
Reheating: To reheat, place the short ribs in a saucepan over low heat. Add a splash of broth or water to loosen up the sauce if it has thickened too much during storage. Stir occasionally to ensure the meat doesn’t dry out. If reheating from frozen, thaw the ribs in the fridge overnight before warming.
Ingredients
-
5 pounds (2.3 kg) beef short ribs (see note for best cuts)
-
Kosher salt and freshly ground black pepper
-
1 tablespoon (15 ml) vegetable or other neutral oil
-
2 celery ribs (about 3 1/2 ounces; 100 g each), cut into 1/2-inch dice
-
2 large carrots (about 8 ounces; 225 g each), cut into 1/2-inch dice
-
1 large (14-ounce; 400 g) yellow onion, cut into 1/2-inch dice
-
5 medium cloves garlic, smashed
-
2 tablespoons (30 ml) tomato paste
-
1 (750 ml) bottle dry red wine
-
1 quart (940 ml) beef stock (homemade or store-bought)
-
1 packet unflavored gelatin (2 1/2 teaspoons; 10 g) if using store-bought stock
-
4 sprigs fresh thyme
-
2 bay leaves
-
1 (750 ml) bottle ruby port wine
-
Slurry made from 1/2 teaspoon cornstarch mixed with 1 teaspoon water (optional)
Instructions
-
Preheat the oven to 300°F (150°C). Season short ribs generously with kosher salt and freshly ground black pepper.
-
Sear the ribs: Heat vegetable oil in a large Dutch oven over medium-high heat. Add short ribs in batches, browning on all sides for about 4 minutes per side. Once browned, transfer ribs to a platter and set aside.
-
Cook aromatics: In the same Dutch oven, add the diced celery, carrots, onion, and garlic. Cook, stirring, until browned, about 6 minutes. Stir in tomato paste and cook for 1 more minute.
-
Deglaze with wine: Add the red wine to the pot, scraping up the caramelized bits from the bottom. Let it simmer for a few minutes to cook off the alcohol.
-
Add stock and herbs: Pour in the beef stock. If using store-bought stock, sprinkle unflavored gelatin over it and let it bloom before adding to the pot. Add thyme and bay leaves.
-
Braise the ribs: Return the short ribs to the pot, nestling them into the braising liquid. Cover partially and transfer to the oven. Braise for 2.5 to 3 hours, or until the meat is fork-tender.
-
Prepare port reduction: While the ribs are braising, add the ruby port wine to a saucepan and simmer over low heat until reduced to a thick syrup (about 1 hour).
-
Remove ribs and strain liquid: Once the ribs are tender, remove them from the pot and set aside. Strain the braising liquid through a fine-mesh strainer to remove the solids.
-
Reduce sauce: Return the strained braising liquid to the Dutch oven and simmer for about 1 hour until reduced by half.
-
Add port reduction: Stir in the reduced port wine to thicken the sauce and deepen the flavor. Taste and adjust seasoning with salt and pepper.
-
Glaze the ribs: Return the short ribs to the pot, spoon the sauce over them, and allow them to glaze for a few minutes.
-
Serve: Plate the ribs with sauce and serve with your choice of sides such as mashed potatoes, polenta, or crusty bread.
Notes
-
Best cut for braising: English-cut short ribs are recommended for braising as they are thicker and have more meat on the bone.
-
Wine choice: A dry red wine like Cabernet Sauvignon, Merlot, or Pinot Noir works best for braising.
-
Gelatin: If using store-bought stock, add unflavored gelatin to ensure the sauce thickens properly.
-
Make-ahead option: This dish can be made ahead of time and stored in the refrigerator for up to 5 days. Reheat gently.
-
Freezing: This recipe freezes well for up to 3 months. Thaw and reheat when ready to serve.
Nutritional Facts (per serving)
-
Calories: 550
-
Protein: 52g
-
Fat: 30g
-
Saturated Fat: 12g
-
Carbohydrates: 18g
-
Fiber: 3g
-
Sugar: 5g
-
Cholesterol: 140mg
-
Sodium: 600mg
Recipe Details
-
Prep time: 15 minutes
-
Cook time: 4 hours 45 minutes
-
Total time: 5 hours
-
Method: Braising
-
Cuisine: American, French-inspired
-
Servings: 4 to 6 servings
-
Calories: 550 per serving
-
Yield: 4 to 6 servings


