Kimchi is a staple in Korean cuisine and known for its bold, tangy flavor, as well as its probiotic benefits. When you’re following a keto or low-carb diet, however, the challenge often comes with finding fermented foods that don’t contain sugar or high-carb ingredients. Traditional kimchi recipes often use sugar, rice flour, and other high-carb ingredients that don’t fit into the ketogenic lifestyle. Luckily, you can enjoy a keto-compliant kimchi with just a few simple modifications.
In this article, we will explore how to make a delicious, keto-friendly kimchi that retains the rich flavor and health benefits of the classic version. We’ll walk you through the ingredients, preparation process, and tips for fermentation to ensure your homemade keto kimchi turns out perfectly every time.
What is Keto Kimchi?
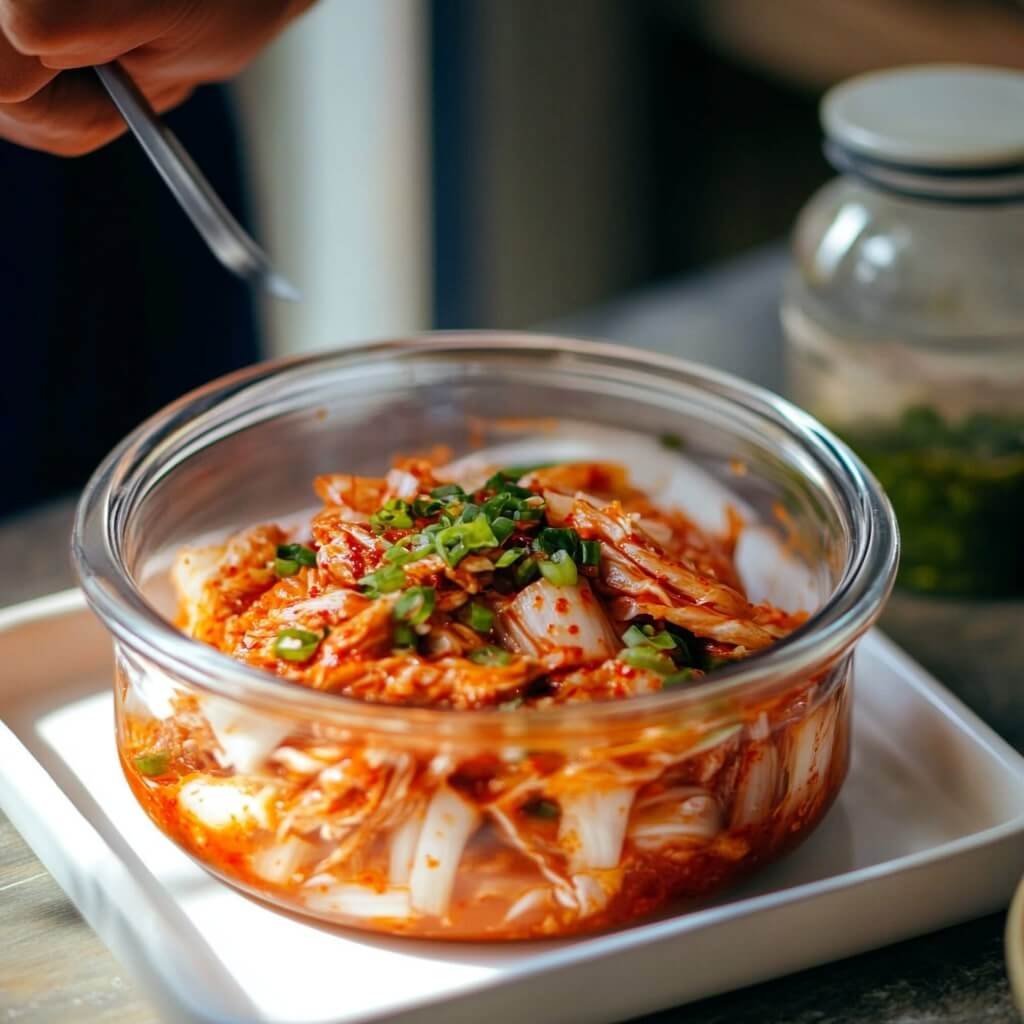
Keto kimchi is a fermented vegetable dish that combines the nutritious benefits of cauliflower or cabbage (traditionally Napa cabbage) with the spicy flavors of Korean red pepper powder (gochugaru) and fermented fish sauce. The fermentation process enhances the flavor, adds beneficial probiotics, and gives this dish a tangy kick. Keto kimchi is naturally low in carbs and is suitable for individuals following keto, paleo, Whole30, or GAPS diets.
Unlike traditional kimchi, which may use ingredients like sugar, rice flour, or high-carb vegetables, keto kimchi sticks to low-carb vegetables and excludes sugar to keep the net carb count low. This makes it the perfect accompaniment to a keto meal.
Benefits of Keto Kimchi
- Low in Carbs: Traditional kimchi can have added sugars or starches, but keto kimchi is free from these ingredients, making it perfect for a ketogenic diet. It’s low in carbs, with only 2-3 grams of net carbs per serving.
- Probiotic-Rich: Like other fermented foods, kimchi is rich in probiotics that promote gut health, boost immunity, and help with digestion. It’s the perfect way to add beneficial bacteria to your diet.
- Nutrient-Dense: Kimchi is packed with vitamins and minerals, especially vitamin C, vitamin K, and various antioxidants that help protect your body from oxidative stress and inflammation.
- Versatile: Keto kimchi can be eaten on its own as a side dish or added to stir-fries, salads, soups, and even keto-friendly fried rice or noodle dishes.
- Customizable: While traditional kimchi can be very spicy, you can adjust the level of heat to your preference by modifying the amount of Korean chili powder used.
Ingredients for Keto Kimchi
To make your keto kimchi at home, you’ll need the following ingredients:
-
Napa Cabbage: This is the base for kimchi and gives the dish its signature crunch and texture.
-
Daikon Radish: A low-carb, crunchy vegetable that adds freshness and bite to your kimchi.
-
Korean Red Pepper Powder (Gochugaru): The spice that gives kimchi its characteristic heat. Gochugaru is milder than cayenne pepper, making it ideal for those who prefer a more balanced heat.
-
Fish Sauce: Provides depth and umami flavor, with a salty kick. Ensure you use a keto-compliant brand, such as “Red Boat,” that doesn’t contain added sugar.
-
Sea Salt: Helps to draw out moisture from the cabbage and aids in the fermentation process.
-
Green Onion: Adds a mild, fresh onion flavor to the mix.
-
Ginger and Garlic: Essential for creating the signature depth of flavor in kimchi.
-
Asian Chives: These have a strong, pungent flavor. If you can’t find them, green onions are a suitable substitute.
Step-by-Step Instructions for Making Keto Kimchi
1. Prepare the Vegetables
-
Napa Cabbage: Cut the cabbage into quarters, remove the core, and slice it into pieces about 1/2 to 3/4 inch wide. Place the cabbage in a large mixing bowl.
-
Salt the Cabbage: Sprinkle sea salt generously over the cabbage and massage it into the leaves. Allow it to sit for about 30 minutes to an hour, until the cabbage softens and releases liquid. This is a critical step for fermenting the kimchi.
-
Daikon Radish and Green Onions: While the cabbage is sitting, peel and julienne the daikon radish, chop the green onions into small pieces, and prepare the Asian chives if you have them.
2. Make the Kimchi Paste
-
Prepare the Paste Ingredients: In a small bowl, combine freshly grated ginger, minced garlic, gochugaru (Korean red pepper powder), and fish sauce. Use a citrus zester for the ginger and a garlic press for finely minced garlic to ensure a smooth consistency.
-
Mix into a Paste: Stir the ingredients together until they form a thick paste. The paste should be a rich, red color from the gochugaru and aromatic from the garlic and ginger.
3. Combine Vegetables and Paste
-
Drain Excess Liquid: After the cabbage has softened and released liquid, squeeze out the excess cabbage juice using your hands or a cheesecloth. You can reserve this juice for other uses, such as adding to soups for an extra flavor boost.
-
Combine Everything: In a large mixing bowl, combine the cabbage, daikon radish, green onions, and Asian chives. Add the prepared paste and mix everything together thoroughly. You may want to wear gloves during this step to avoid staining your hands and to ensure the paste is evenly distributed.
4. Fermentation Process
-
Transfer to Fermentation Vessel: Transfer the mixed ingredients into a sealable glass container, such as a mason jar, or use a ceramic crock if available. Pack the mixture tightly, ensuring no air pockets are left.
-
Ferment: Seal the jar loosely (or cover the crock) and leave it at room temperature for 3-5 days. Check daily to release any gas buildup (or “burp” the jar). Start tasting the kimchi after 3 days to determine when it reaches your desired tanginess level.
-
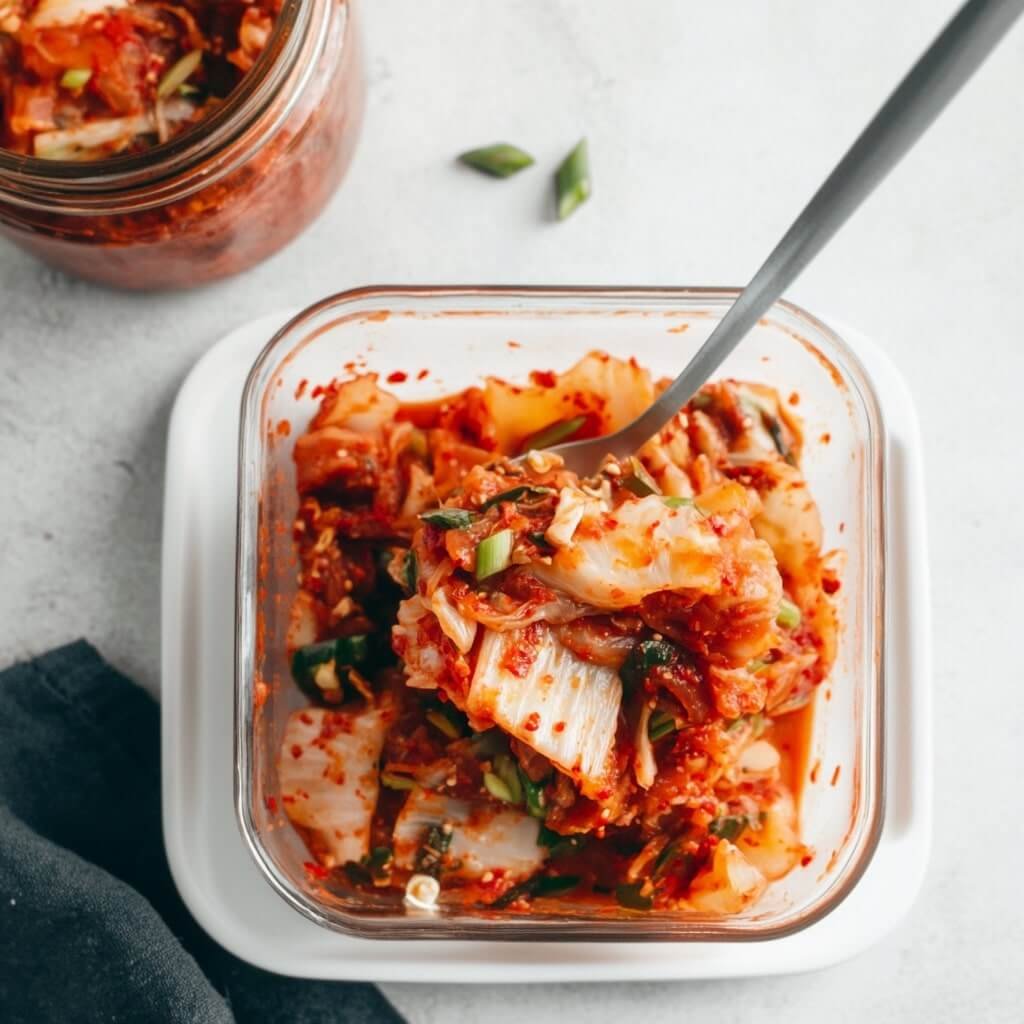
Move to Cold Storage: Once the kimchi is tangy enough, transfer it to the refrigerator to slow down the fermentation process. The kimchi can be stored in the fridge for months to up to a year.
Tips for Perfect Keto Kimchi
-
Use Fresh Ingredients: The fresher your vegetables, the better the final product will taste. Choose fresh napa cabbage, daikon radish, and green onions for the best texture and flavor.
-
Customizable Heat: Adjust the amount of gochugaru based on how spicy you prefer your kimchi. Start with a smaller amount and increase it as you go.
-
Fermentation Vessel: If you’re using a regular mason jar, ensure the lid is not screwed on tightly during fermentation. You can also use fermentation lids to let gas escape safely.
-
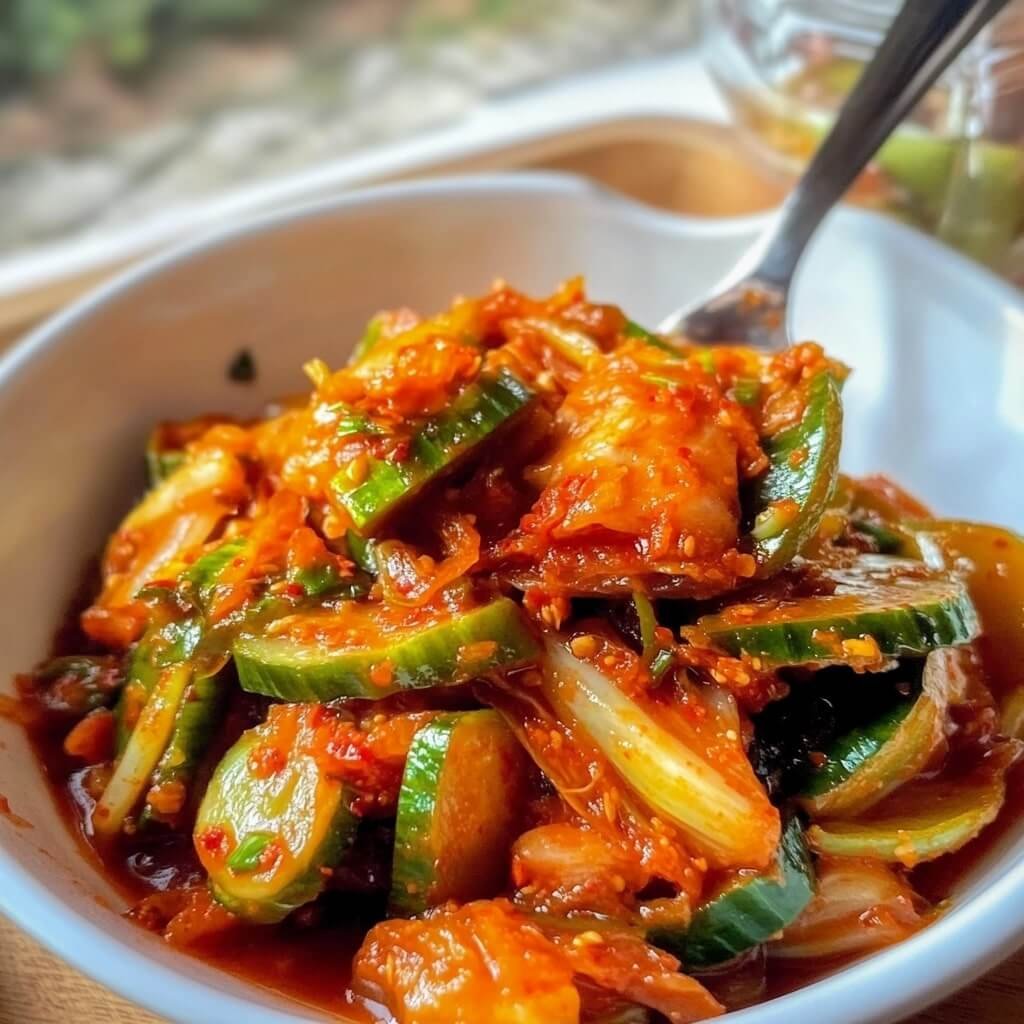
Flavor Variations: Try adding other low-carb vegetables like carrots or bok choy, or add herbs like cilantro or basil to personalize your kimchi flavor.
Kimchi Variations for Whole30, Paleo, and GAPS
If you’re following Whole30, Paleo, or GAPS, there are a few variations you can try to make your kimchi even more nutrient-dense:
-
Paleo Apple-Fermented Kimchi: Replace some of the radish or cabbage with apple or pear puree. This adds a natural sweetness and helps achieve a thicker, saucier consistency without using sugar.
-
No-Sugar Kimchi: Make sure to avoid added sugars or any preservatives found in some store-bought fish sauces. Stick to pure, high-quality fish sauce brands like “Red Boat.”
Keto Kimchi Serving Suggestions
-
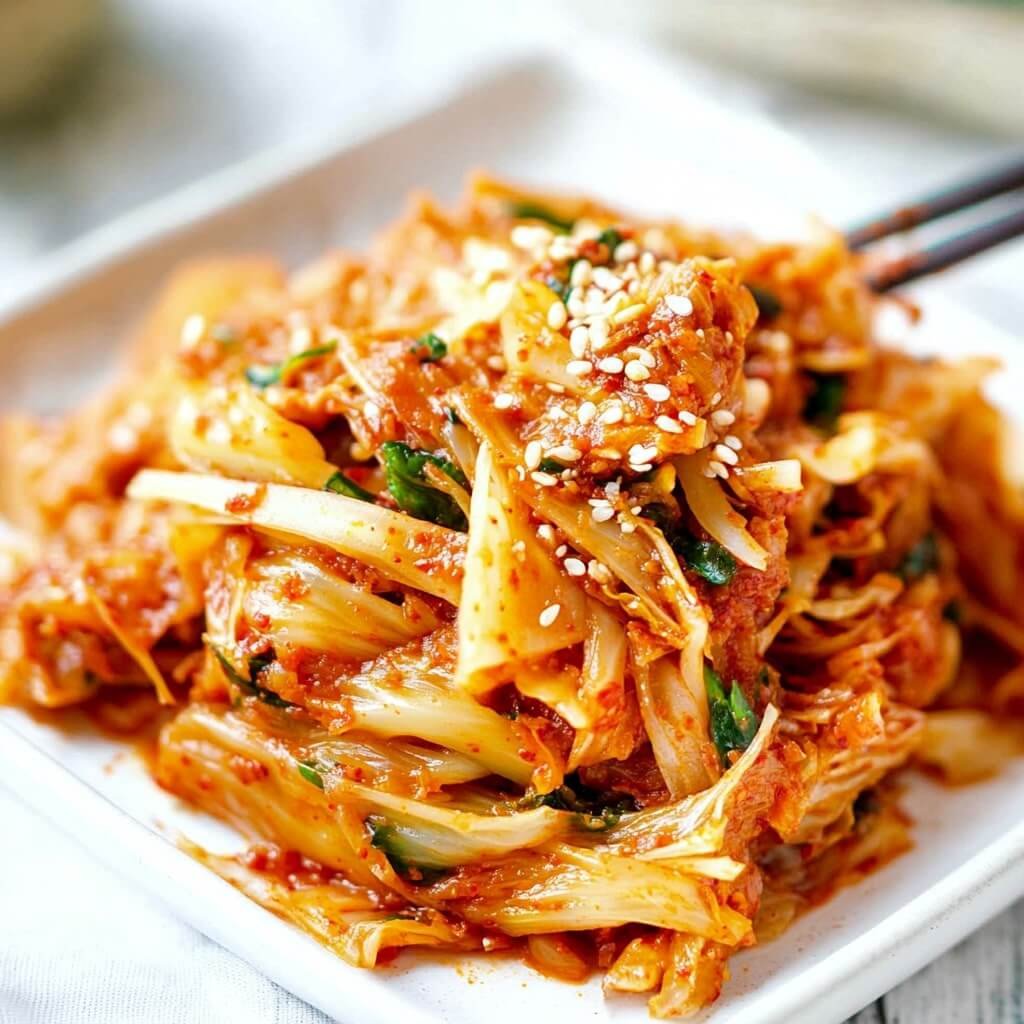
As a Side Dish: Enjoy kimchi as a side dish with grilled meats, seafood, or stir-fries.
-
In Soups and Stews: Kimchi can be added to soups like kimchi jjigae (kimchi stew) or to keto-friendly noodle soups for a tangy, spicy kick.
-
With Eggs: Mix kimchi with scrambled eggs or use it as a topping for omelets for a quick breakfast.
How to Store Keto Kimchi
Making keto kimchi in bulk is a fantastic way to meal prep and ensure you have a healthy, probiotic-rich side dish for the days ahead. Proper storage and fermentation are key to keeping the kimchi fresh and flavorful for an extended period.
- Storing Fresh Kimchi
If you want to store your kimchi before fermentation starts, you can keep it in the refrigerator for a couple of days. The flavors will develop over time, but it’s best to let it ferment at room temperature for 3-5 days before refrigerating. - Storing Fermented Kimchi
Once the kimchi has fermented to your liking, move it to the fridge to slow down the fermentation process. This will help preserve its tangy flavor. Store it in a tightly sealed jar to keep it fresh and minimize exposure to air. It will last for months to a year, depending on how it’s stored. - Freezing Kimchi
While kimchi can be frozen, it’s important to note that freezing will change the texture and potentially lessen the crunch. If you plan to freeze kimchi, do so once it’s fully fermented and cooled. Portion the kimchi into smaller containers or freezer bags to make it easier to thaw only what you need. Kimchi can be kept in the freezer for up to three months. - Reheating Kimchi
Kimchi can be enjoyed both cold and at room temperature. However, if you prefer warm kimchi, simply add it to a hot dish such as stir-fries or soups to bring out its full flavor. Avoid microwaving it on its own, as the flavor may degrade with excessive heat. - Tips for Keeping Kimchi Fresh
To maintain the best taste, store your kimchi in the coldest part of the refrigerator, such as near the back. Be sure to use a clean utensil each time you remove some kimchi from the jar to avoid contamination and spoilage.
Fermentation Tips for a Better Kimchi
- Use Glass Jars or Ceramic Crocks: A glass jar or ceramic crock is the best tool for fermenting kimchi. It allows for airflow while still sealing in moisture and preserving the flavors.
- “Burp” Your Jars: If you’re using a glass jar with a tight lid, make sure to “burp” it daily during the fermentation process. This means loosening the lid to allow the built-up gases to escape, preventing the jar from breaking or over-pressurizing.
- Watch the Temperature: Room temperature is ideal for fermenting kimchi. During colder weather, it may take longer to ferment, while in warmer weather, fermentation will occur faster. If your kitchen is warm, check the kimchi after 2-3 days to see if it’s tangy enough.
- Taste Along the Way: Kimchi’s flavor develops over time, so it’s essential to taste it during fermentation. The longer you ferment it, the tangier it will become. However, don’t let it ferment for too long, or the flavor might become too strong and unpleasant.
Keto Kimchi Recipe Variations
While the base recipe for keto kimchi is delicious on its own, you can easily customize it to suit your personal preferences or dietary needs. Here are a few variations to consider for experimenting with flavors, textures, and ingredients.
- Spicy Keto Kimchi
For those who love an extra kick, try ramping up the heat with additional spicy ingredients. You can adjust the level of heat in your kimchi by:
- More Gochugaru: Add an extra tablespoon or two of gochugaru (Korean red pepper flakes) for a spicier result.
- Chili Paste: Consider adding a teaspoon of chili paste or sriracha to infuse the kimchi with even more heat.
- Fresh Chilies: Thinly slice fresh red chilies and mix them into your kimchi for a fresh, spicy bite.
- Vegan Keto Kimchi
If you’re following a plant-based or vegan keto diet, you can make a delicious vegan kimchi by replacing the fish sauce with a vegan-friendly substitute. Here are a few options:
- Coconut Aminos: This is a great soy-free, gluten-free substitute for soy sauce or fish sauce.
- Mushroom Broth: Use a small amount of mushroom broth for umami flavor.
- Seaweed: Dried seaweed or nori can provide an additional depth of flavor similar to fish sauce.
- Tropical Keto Kimchi
For a unique twist, you can add a bit of sweetness to your kimchi with tropical fruits. These fruits complement the tangy, spicy flavors and add a touch of natural sweetness without compromising the low-carb nature of the dish.
- Pineapple: Pineapple pairs beautifully with the spiciness of kimchi and adds a nice balance of sweet and sour.
- Mango: A small amount of mango puree or diced mango can infuse the kimchi with a tropical, fruity flavor.
- Garlic-Infused Kimchi
For garlic lovers, you can increase the amount of garlic in your kimchi to enhance its bold flavor. Try the following:
- Extra Garlic Cloves: Add more minced garlic for a stronger garlic presence.
- Garlic Infused Oil: Drizzle a little garlic-infused oil into the kimchi during the mixing stage for an even richer garlic flavor.
- Keto Kimchi with Extra Veggies
If you love a more hearty and veggie-packed kimchi, consider adding more low-carb vegetables to the mix. Here are some options:
- Cabbage and Kale: Combine Napa cabbage with kale for a heartier texture.
- Radishes: Add more daikon radishes or even turnips for an extra crunch and a mild peppery flavor.
- Zucchini: Grate some zucchini to include a lighter, slightly sweet flavor.
Tips for Making the Perfect Keto Kimchi
- Ferment at Room Temperature: Keep your kimchi at room temperature while it ferments. This allows the natural bacteria to develop, creating the distinct tangy flavor.
- Don’t Overpack the Jar: Avoid pressing the kimchi too tightly into the jar. It’s important to leave some room for the kimchi to expand during fermentation.
- Taste Often: Kimchi is a living food, and its flavor develops over time. Be sure to taste it daily to check its tanginess and ensure it reaches your preferred level of fermentation.
- Keep It Air-Tight: Store your kimchi in airtight containers to avoid exposure to air, which can result in spoilage or contamination.
FAQs On Keto Kimchi Recipe
- Is kimchi good for keto diet?
Yes, kimchi is an excellent addition to a keto diet. It’s low in carbs and rich in probiotics, making it a great choice for promoting gut health. The primary ingredients in kimchi, such as napa cabbage, radishes, garlic, and chili, are all keto-friendly, provided the recipe doesn’t include any high-carb additives like sugar. - Is cabbage ok for keto?
Yes, cabbage is keto-friendly! It’s low in carbs, high in fiber, and a great source of vitamins and minerals. You can enjoy cabbage in many forms, whether raw, cooked, or fermented (like in kimchi), without worrying about exceeding your daily carb limits. - Is fermented keto-friendly?
Fermented foods are typically keto-friendly as they are low in carbohydrates and high in beneficial probiotics. Foods like kimchi, sauerkraut, pickles, and kefir can be great additions to your keto diet. The fermentation process doesn’t add significant carbs but enhances the flavors and digestive benefits. - Are probiotics OK on keto?
Yes, probiotics are not only okay on keto, but they can also be very beneficial. Probiotics, found in fermented foods like kimchi, sauerkraut, and yogurt (without added sugars), can support gut health, improve digestion, and boost immunity—important benefits while following a keto diet. - Does fermentation remove carbs?
Fermentation can reduce some carbohydrates in food, but it doesn’t remove them entirely. In foods like kimchi, fermentation breaks down sugars into lactic acid, making the dish more digestible and reducing some of the sugar content. However, it is important to keep an eye on the total carb count, especially if additional ingredients with sugar or starch are added.
Keto Kimchi Recipe Card
Ingredients:
- 4 pounds Napa cabbage (approximately 1 large napa cabbage)
- 1/4 cup sea salt
- 2 cups julienned daikon radish
- 3 stalks green onions, chopped
- 1/2 cup chopped Asian chives (can substitute with green onions)
- 10 cloves garlic, minced
- 1 teaspoon freshly grated ginger
- 6 tablespoons Korean red pepper powder (gochugaru)
- 1/4 cup fish sauce (ensure it’s sugar-free)
Instructions:
- Prepare the Cabbage: Cut the napa cabbage into quarters lengthwise. Remove the core and discard. Slice the remaining cabbage cross-wise into 1/2 to 3/4-inch pieces.
- Salt the Cabbage: Place the cabbage into a large mixing bowl. Sprinkle salt over the cabbage and massage it gently with your hands. Let the cabbage sit for at least 30 minutes, allowing it to soften and release liquid.
- Prepare the Vegetables: While the cabbage is sitting, peel and julienne the daikon radish. Chop the green onions and Asian chives into small pieces. Mince the garlic and grate the ginger.
- Make the Paste: In a separate bowl, combine the garlic, ginger, Korean red pepper powder, and fish sauce to create a paste. Mix well until all ingredients are fully combined.
- Combine the Ingredients: Squeeze out as much of the cabbage juice as possible and discard it. Add the cabbage, daikon radish, green onions, and Asian chives into an empty mixing bowl.
- Add the Paste: Pour the prepared spicy paste into the bowl with the vegetables and mix until everything is evenly coated.
- Fermentation: Transfer the kimchi mixture into a 2-quart mason jar. Seal the jar and leave it at room temperature for 5 days to ferment. Open occasionally to release any gas produced during fermentation.
- Storage: Once the kimchi reaches the desired tangy taste, move it to the fridge or cold storage to slow down fermentation. It can be stored in the fridge for months to a year.
Notes:
- Fermentation Time: The fermentation time may vary depending on room temperature. Start tasting after 3 days to check for tanginess.
- Fermentation Vessels: Use a sealable glass container or mason jar. Fermentation crocks are also a great option. Remember to “burp” the jar to release gas if needed.
- Substitutions: If Asian chives aren’t available, substitute with an equal amount of green onions.
Nutritional Facts (per serving, approximately 1/4 cup):
- Calories: 187 kcal
- Carbohydrates: 9g
- Net Carbs: 2g
- Protein: 5g
- Fat: 6.6g
- Saturated Fat: 3.6g
- Fiber: 3.5g
- Sugar: 3.5g


