If you’re on a keto or gluten-free diet and missing the soft, comforting texture of bread, you’re in the right place. This Mini Waffle Maker Sandwich Bread recipe is here to save the day! It’s quick, easy, and creates a fluffy, low-carb bread that’s perfect for sandwiches, breakfast, or even as a snack. Made with simple, keto-friendly ingredients, this recipe is ideal for anyone craving bread without the carbs or gluten.
The best part about making this Mini Waffle Maker Sandwich Bread is how easy it is. Using a mini waffle maker for sandwich bread might sound unconventional, but it’s the perfect method to create soft, fluffy, and perfectly cooked bread in no time. If you’re tired of complicated bread-making recipes or long preparation times, this recipe will quickly become your go-to solution.
Why Choose Mini Waffle Maker Sandwich Bread?
The mini waffle maker isn’t just for waffles – it’s the secret to making a quick, low-carb sandwich bread that’s soft, airy, and just the right texture. When you cook this Mini Waffle Maker Sandwich Bread, you get the best of both worlds: a crispy outside with a soft and tender inside, perfect for all your sandwich needs.
Here’s why the Mini Waffle Maker Sandwich Bread is a must-try for any keto or gluten-free dieter:
-
Fast and Easy: This bread is incredibly quick to make. No waiting for dough to rise or long baking times. In just minutes, you can have fresh bread ready.
-
Fluffy Texture: The waffle maker cooks the bread evenly and quickly, ensuring a light and airy texture that’s perfect for sandwiches.
-
Low-Carb and Gluten-Free: Perfect for anyone looking to reduce carbs or avoid gluten. This bread is packed with protein and healthy fats while keeping the carbs to a minimum.
-
Versatile: Use it for all kinds of sandwiches, from savory options like turkey and cheese to sweet creations with almond butter or jam.
Let’s dive into how you can make this delicious Mini Waffle Maker Sandwich Bread that’s not only easy but incredibly tasty!
Ingredients You’ll Need
Making Mini Waffle Maker Sandwich Bread is simple because you only need a few basic ingredients. These keto-friendly staples will make your bread soft and perfect for a wide range of uses.
Here’s what you need to gather:
-
Eggs: The main binding agent for the bread. It helps provide structure and keeps the bread from falling apart.
-
Almond Flour: The perfect flour substitute for a low-carb, gluten-free option. It gives the bread a slightly nutty flavor and a light, fluffy texture.
-
Baking Powder: The leavening agent that ensures your bread rises and becomes light and airy.
-
Mayonnaise: Adds moisture and richness, making the bread tender and soft.
-
Water: Adjusts the consistency of the batter. You can use almond milk if you prefer a dairy-free option.
-
Salt: A pinch to enhance the flavor.
-
Optional Sweetener: If you’re looking for a hint of sweetness, you can add a keto-friendly sweetener like monk fruit or stevia. This is optional depending on your preference.
Tips for Perfect Mini Waffle Maker Sandwich Bread
-
Use Room Temperature Ingredients: Make sure your eggs and mayonnaise are at room temperature before mixing. This ensures that everything combines smoothly.
-
Whisk Well: The batter should be smooth and free of lumps for the best texture. Give it a good whisk to ensure it’s fully mixed.
-
Don’t Overfill the Waffle Maker: Pour just enough batter to cover the waffle iron. Overfilling can make it harder for the bread to cook properly.
-
Use Cooking Spray: To prevent the batter from sticking, lightly spray your mini waffle maker with cooking spray before each batch.
How to Make Mini Waffle Maker Sandwich Bread
This recipe is straightforward, and making Mini Waffle Maker Sandwich Bread is easier than you might think! Here’s a step-by-step guide to get your bread ready:
Step 1: Preheat Your Mini Waffle Maker
Start by preheating your mini waffle maker. This ensures that your bread cooks evenly and gets that perfect texture.
Step 2: Mix the Ingredients
In a mixing bowl, whisk together the eggs, almond flour, baking powder, mayonnaise, and a pinch of salt. If you’re using a sweetener, mix that in as well. Stir until the batter is smooth with no lumps.
Step 3: Cook the Bread
Lightly grease your mini waffle maker with cooking spray. Pour about 3 tablespoons of batter into the waffle maker. Close the lid and cook for 2 minutes, or until the bread is golden and firm to the touch. Depending on your mini waffle maker, cooking times may vary, so keep an eye on it.
Step 4: Remove and Cool
Once the bread is cooked, carefully remove it from the waffle maker and let it cool for a few minutes. Cooling it on a wire rack helps it maintain its shape and prevents it from being too soft when sliced.
Step 5: Serve and Enjoy
Now that your Mini Waffle Maker Sandwich Bread is ready, you can slice it and use it for sandwiches or enjoy it on its own with toppings like butter, jam, or cheese. The bread is soft enough to be used for delicate sandwiches or hearty enough to hold up against thicker fillings.
Ways to Serve Mini Waffle Maker Sandwich Bread
One of the best things about Mini Waffle Maker Sandwich Bread is its versatility. You can use it in various ways, whether for breakfast, lunch, or dinner. Here are a few delicious ideas on how to serve your mini waffle maker bread:
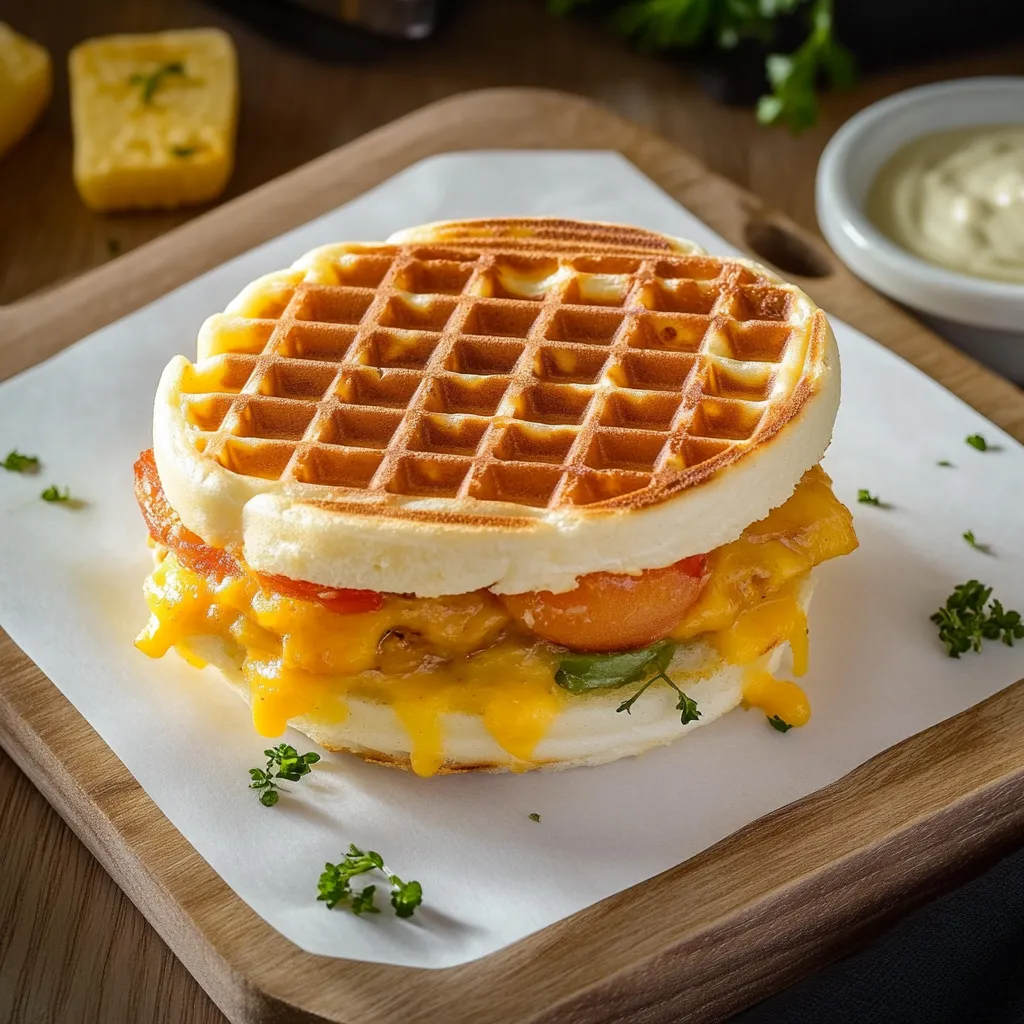
1. Classic Sandwiches
Use your Mini Waffle Maker Sandwich Bread as the base for your favorite sandwiches. From deli meats and cheese to veggies or spreads, this bread can hold all kinds of fillings without falling apart. Here are some ideas:
-
Turkey and Cheese Sandwich: Layer turkey, cheese, and some leafy greens between two slices of bread for a satisfying meal.
-
Egg Salad Sandwich: Spread a creamy egg salad filling between slices of this soft bread for a delicious, protein-packed lunch.
-
Tuna Salad: A classic tuna salad made with mayonnaise and crunchy veggies is perfect for this bread.
2. Breakfast Sandwiches
You can turn this bread into a quick and hearty breakfast sandwich. Top it with scrambled eggs, bacon, and a slice of cheese for a filling start to your day. This is also a great option if you’re following a keto diet and need a low-carb alternative to traditional breakfast sandwiches.
3. Serve as Waffles
While this recipe is designed for making sandwich bread, you can also enjoy it as a traditional waffle! Add a bit of sweetener like stevia or monk fruit and serve it with sugar-free syrup, whipped cream, or fresh berries for a keto-friendly breakfast.
4. Make Mini Waffle Maker Toast
For a simple snack, lightly toast your mini waffles in a toaster oven or on a skillet. You can top them with butter, avocado, or any spread of your choice. This works great for a savory treat or as an appetizer with cheese or dips.
5. Pizza Base
Another creative way to use your Mini Waffle Maker Sandwich Bread is as a base for keto pizza. Simply add your favorite pizza sauce, cheese, and toppings, then toast it in the oven until the cheese is melted. It’s a quick and easy pizza solution without the carbs.
6. Use with Keto Soups or Stews
This bread is a great addition to any keto-friendly soups or stews. Slice the bread and serve alongside your favorite dishes. The fluffy texture of the bread complements the richness of a hearty soup.

How to Store Mini Waffle Maker Sandwich Bread
While Mini Waffle Maker Sandwich Bread is best served fresh, it can be stored for later use. Here’s how to store your bread to keep it fresh and delicious for longer:
1. Storing in the Refrigerator
If you plan to eat the bread within a few days, store it in an airtight container or a zip-lock bag in the fridge. It will stay fresh for up to 2 days in the refrigerator.
2. Freezing for Later Use
To store your Mini Waffle Maker Sandwich Bread for longer periods, freezing is your best option. Here’s how to do it:
-
Arrange the cooked mini waffles in a single layer on a baking sheet. If you need to stack them, place parchment paper between each layer.
-
Freeze the bread for a few hours, then transfer the frozen slices to a freezer-safe bag. This will prevent them from sticking together.
-
You can store the bread in the freezer for up to 1 month. When you’re ready to eat, simply toast the slices straight from the freezer for a quick meal.
3. Reheating Tips
To reheat frozen Mini Waffle Maker Sandwich Bread, you can:
-
Toast it directly from the freezer for a crispy texture.
-
Microwave for a few seconds if you want a soft slice, but be careful not to overheat as it can become chewy.
Common Mistakes to Avoid When Making Mini Waffle Maker Sandwich Bread
Even though this Mini Waffle Maker Sandwich Bread recipe is simple, a few mistakes can affect the texture and outcome. Here are some common mistakes to avoid:
1. Not Preheating the Waffle Maker
Make sure to preheat your mini waffle maker before adding the batter. This ensures that the bread cooks evenly and gives you that crispy, golden crust.
2. Overfilling the Waffle Maker
If you overfill the waffle maker, the bread will be difficult to remove and might not cook evenly. Pour in just enough batter to cover the bottom of the waffle plates.
3. Not Using the Right Almond Flour
Always use blanched almond flour for the best texture. Almond meal is coarser and can result in a denser bread that doesn’t rise as well.
4. Overcooking the Bread
Since the waffle maker cooks quickly, keep an eye on your bread to avoid overcooking. Once it turns golden brown and firm, remove it from the waffle maker to prevent it from becoming dry.
5. Not Letting the Bread Cool
After cooking, let the bread cool on a wire rack for a few minutes before slicing. This helps set the structure and prevents the bread from being too soft and falling apart when sliced.
Variations of Mini Waffle Maker Sandwich Bread
While the basic Mini Waffle Maker Sandwich Bread is delicious on its own, you can experiment with various flavors and variations to suit your taste. Here are some ideas to mix things up:
1. Garlic and Herb Mini Waffle Maker Sandwich Bread
Add some garlic powder, dried oregano, or rosemary to the batter for a savory twist. This is great for pairing with keto soups or as a side to your main dish.
2. Cheese-Stuffed Mini Waffle Maker Sandwich Bread
Mix in some shredded mozzarella or cheddar cheese into the batter before cooking. This will give the bread a rich, cheesy flavor that pairs perfectly with savory fillings like ham or turkey.
3. Sweet Mini Waffle Maker Sandwich Bread
For a slightly sweet bread, add a bit of cinnamon and a sweetener like monk fruit or stevia. This variation works great for breakfast, especially when served with a dollop of whipped cream or almond butter.
4. Spicy Mini Waffle Maker Sandwich Bread
For a kick of spice, add a pinch of cayenne pepper or paprika to the batter. This is an excellent option if you’re serving the bread with spicy dishes like keto chili or BBQ.
Troubleshooting Mini Waffle Maker Sandwich Bread
While Mini Waffle Maker Sandwich Bread is a relatively simple recipe, there are a few potential challenges that could arise. Here are some troubleshooting tips to help you get the best results every time:
1. Dense or Heavy Bread
If your bread turns out dense, it may be due to overmixing the batter. Mixing too much can cause the almond flour to release too much oil, making the bread heavier. To prevent this, mix just until the ingredients are combined. Additionally, ensure you’re using blanched almond flour rather than almond meal, as almond meal can lead to a denser texture.
2. Bread Doesn’t Cook Evenly
If your bread isn’t cooking evenly, it could be because the waffle maker wasn’t preheated properly or the batter was spread unevenly. Make sure to preheat your waffle maker before adding the batter, and pour the batter evenly into the center to ensure even cooking.
3. Bread Is Too Soft
If your bread is too soft and falls apart when sliced, it may need a little more time to cook. Every waffle maker is different, so you may need to adjust the cooking time. Try letting it cook for an additional 30-60 seconds, or check to ensure the bread is golden and firm to the touch before removing it.
4. Bread Sticks to the Waffle Maker
To prevent sticking, make sure to use a light coating of cooking spray or a bit of butter before adding the batter to the waffle maker. If the bread still sticks, it might be because there was too much batter, or the waffle maker wasn’t greased enough.
Nutritional Benefits of Mini Waffle Maker Sandwich Bread
This Mini Waffle Maker Sandwich Bread isn’t just delicious – it’s packed with nutritional benefits that fit perfectly into a low-carb or keto diet. Here’s a breakdown of its key nutrients:
1. Low-Carb
Each slice of Mini Waffle Maker Sandwich Bread contains just 2g of net carbs, making it ideal for those following a ketogenic or low-carb diet. You can enjoy bread without worrying about spiking your blood sugar.
2. High in Protein
Thanks to the eggs and almond flour, this bread is a good source of protein. Each slice contains approximately 5g of protein, which helps keep you feeling full and satisfied.
3. Rich in Healthy Fats
The mayonnaise adds a healthy dose of fats to the bread, supporting your body’s need for fat in a keto diet. Healthy fats are essential for energy and maintaining a balanced diet.
4. Gluten-Free and Dairy-Free (Optional)
This recipe is naturally gluten-free, making it perfect for anyone with gluten sensitivities. By using almond flour and mayonnaise, you can also make it dairy-free, ensuring that those with lactose intolerance can enjoy it too.
Final Thoughts on Mini Waffle Maker Sandwich Bread
If you’ve been missing bread while following a keto or gluten-free diet, this Mini Waffle Maker Sandwich Bread is the perfect solution. It’s quick, easy to make, and provides a delicious, low-carb alternative to traditional bread. Whether you’re using it for sandwiches, breakfast, or as a simple snack, this bread is versatile enough for any meal.
The best part? You can customize it to suit your taste. Add herbs for a savory twist, or go sweet with cinnamon for a breakfast treat. Whatever you choose, this bread is bound to become a staple in your kitchen.
With just a few simple ingredients and a mini waffle maker, you’ll have fresh, fluffy bread ready in minutes. So, grab your waffle maker and give this recipe a try – your taste buds (and your waistline) will thank you!
Mini Waffle Maker Sandwich Bread Recipe Card
Ingredients:
-
2 large eggs
-
1/4 cup almond flour (blanched)
-
1/2 teaspoon baking powder
-
2 tablespoons mayonnaise (full-fat)
-
1 tablespoon water (or almond milk)
-
1/4 teaspoon salt (optional)
-
Keto-friendly sweetener (optional, to taste)
Instructions:
-
Preheat your mini waffle maker according to the manufacturer’s instructions.
-
Whisk the eggs, almond flour, baking powder, mayonnaise, water, and salt (and sweetener, if using) in a bowl until smooth and free of lumps.
-
Lightly grease the waffle maker with cooking spray or a little butter.
-
Pour about 3 tablespoons of the batter into the waffle maker, spreading it evenly.
-
Close the waffle maker and cook for about 2 minutes, or until the bread is golden brown and firm to the touch.
-
Carefully remove the bread from the waffle maker and allow it to cool for a few minutes before slicing.
-
Serve immediately, or store leftovers in an airtight container for later use.
Notes:
-
Room Temperature Ingredients: Ensure your eggs and mayonnaise are at room temperature for the best texture.
-
Don’t Overfill: Avoid overfilling the waffle maker to ensure even cooking and easy removal.
-
Grease the Waffle Maker: Lightly grease the waffle plates before each batch to prevent sticking.
-
Freezing: Freeze leftover slices by placing them in a single layer on a baking sheet, then transfer to a freezer-safe bag for up to 1 month.
-
Customizable: Add your favorite herbs, spices, or a bit of shredded cheese for a unique twist.
Nutritional Facts (per slice):
-
Calories: 120 kcal
-
Total Fat: 11g
-
Saturated Fat: 2g
-
Unsaturated Fat: 9g
-
-
Cholesterol: 96mg
-
Sodium: 206mg
-
Carbohydrates: 2g
-
Fiber: 1g
-
Sugar: 0g
-
-
Protein: 5g
-
Vitamin A: 113 IU
-
Calcium: 64mg
-
Iron: 1mg
Prep Time: 5 minutes
Cook Time: 2 minutes
Total Time: 7 minutes
Method: Waffle Maker
Cuisine: Keto, Gluten-Free
Servings: 2 slices
Yield: 1 batch (approximately 2 slices)


