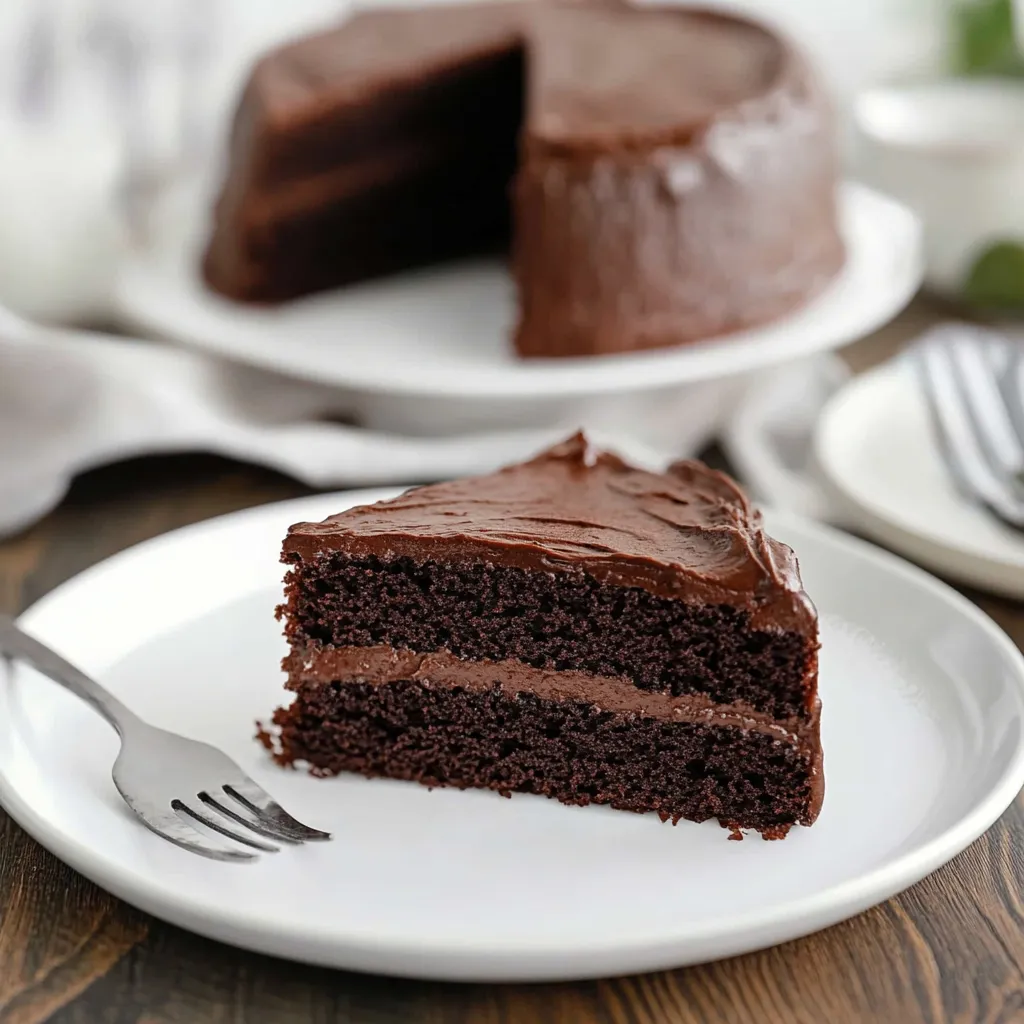
There’s something magical about a perfectly moist and rich gluten-free chocolate cake, and when it’s made from scratch, it’s even more special. This moist and rich gluten-free chocolate cake recipe is designed to deliver a cake that’s every bit as delicious as its traditional counterpart—no compromises on texture or taste. It’s perfect for anyone following a gluten-free diet, but also for anyone who simply enjoys a slice of decadent, melt-in-your-mouth chocolate cake.
Making a homemade moist and rich gluten-free chocolate cake might seem daunting at first, but it’s actually easier than you think. With just a few simple ingredients and some helpful tips, you can create a cake that will impress your friends and family. Whether you’re preparing for a special occasion or just want to treat yourself to something indulgent, this recipe will deliver every time.
In this article, we will guide you through each step of making the best moist and rich gluten-free chocolate cake, including ingredient choices, mixing techniques, and expert tips to achieve the perfect crumb. Let’s dive in!
What Makes This Cake So Moist and Rich?
You might be wondering what exactly makes a moist and rich gluten-free chocolate cake so special, especially when gluten-free baking can sometimes result in a dry or dense texture. It’s all about the right balance of ingredients and proper techniques.
-
Boiling Water: A key ingredient in this recipe is boiling water. While it may seem unconventional, adding hot water works wonders for gluten-free cakes. The boiling water helps dissolve the cocoa powder, activates it to bring out the deep chocolate flavor, and hydrates the gluten-free flour. This results in a smooth, moist batter without the usual grittiness associated with gluten-free flour.
-
Oil Instead of Butter: Using oil instead of butter not only makes the cake easier to adapt for dairy-free versions but also contributes to the moist crumb. Oil retains moisture during baking, helping create a cake that is soft and tender without being greasy.
-
Eggs: Eggs are essential in gluten-free baking as they provide structure and help bind the ingredients together. They also contribute to the soft, airy texture of the cake.
-
Flour Blend: The choice of gluten-free flour blend is crucial. For the best texture, use a high-quality gluten-free all-purpose flour blend that contains xanthan gum or guar gum. This ingredient helps mimic the structure that gluten typically provides in traditional cakes.
When you combine these ingredients, you get a cake that’s soft, moist, and rich in flavor—everything you could want in a chocolate cake, but without the gluten!
The Ingredients You’ll Need
Before you start baking, it’s important to gather all your ingredients. Here’s a breakdown of what you’ll need for this moist and rich gluten-free chocolate cake:
-
Gluten-Free All-Purpose Flour: Make sure the flour blend you use includes xanthan gum or guar gum. I recommend using Bob’s Red Mill 1:1 or Cup4Cup for the best results.
-
Unsweetened Cocoa Powder: For a rich chocolate flavor, choose unsweetened cocoa powder. Regular or Dutch-processed cocoa works well, depending on your taste preference.
-
Baking Powder and Baking Soda: These leavening agents help the cake rise and give it a light, fluffy texture.
-
Granulated Sugar: The sugar helps sweeten the cake and contributes to its moist texture. You can also use a mix of brown and white sugar for added richness.
-
Eggs: Eggs help bind the ingredients and provide structure to the cake. They also contribute to the cake’s moist crumb.
-
Milk: Any type of milk works here—dairy or non-dairy. I recommend almond milk or oat milk for a dairy-free option, but you can use regular milk if preferred.
-
Vegetable Oil: Oil adds moisture to the cake. You can substitute with other oils like canola or avocado oil, but stick with a neutral oil for the best flavor.
-
Vanilla Extract: Vanilla enhances the flavor and complements the richness of the chocolate.
-
Boiling Water: The secret ingredient that makes this cake so moist and rich! The hot water helps activate the cocoa powder, making the chocolate flavor more intense, and it also hydrates the gluten-free flour, resulting in a smoother batter.
How to Make Moist and Rich Gluten-Free Chocolate Cake
Making this moist and rich gluten-free chocolate cake is easier than you think. Here’s a step-by-step guide to help you get the perfect cake every time:
Step 1: Prepare Your Cake Pans
Preheat your oven to 350°F (175°C). Grease two 9-inch round cake pans with oil or butter, and line the bottoms with parchment paper. This will prevent the cakes from sticking and ensure they come out of the pans easily after baking.
Step 2: Mix the Dry Ingredients
In a large bowl, whisk together the gluten-free flour, cocoa powder, baking powder, baking soda, and salt. It’s important to sift the cocoa powder to prevent clumps from forming in the batter.
Step 3: Add the Wet Ingredients
Add the eggs, milk, oil, and vanilla extract to the dry ingredients. Stir everything together until the mixture is smooth. If using a hand or stand mixer, mix on low speed until the ingredients are fully incorporated.
Step 4: Add the Boiling Water
This is where the magic happens! With the mixer on low, slowly add the boiling water to the batter. It will seem thin, but that’s totally normal. The boiling water activates the cocoa and helps the batter become smooth, ensuring a moist and rich texture.
Step 5: Bake the Cake
Divide the batter evenly between the two prepared cake pans. Bake the cakes for 30-35 minutes, or until a toothpick inserted in the center comes out clean. Keep an eye on the cakes, as oven times can vary.
Step 6: Cool the Cake
Let the cakes cool in the pans for 10-15 minutes. After that, remove them from the pans and place them on a wire rack to cool completely before frosting.
Storing and Freezing Your Moist and Rich Gluten-Free Chocolate Cake
If you have leftovers or want to prepare this cake ahead of time, here’s how to properly store and freeze it to maintain its freshness and moist texture.
Storing the Cake
-
Room Temperature: If you plan on serving the cake within a few days, you can store it at room temperature. Make sure to cover the cake tightly with plastic wrap or store it in an airtight container to prevent it from drying out. The cake will stay fresh for 3-4 days at room temperature.
-
Refrigeration: If you need to store the cake for a longer period, refrigerate it. However, refrigerating can sometimes cause cakes to dry out, so it’s best to store the cake at room temperature if you plan on eating it within a day or two. If you refrigerate it, make sure it’s tightly wrapped or in an airtight container. It will stay fresh for up to 1 week in the fridge.
Freezing the Cake
Freezing is a great option if you want to prepare the cake in advance or preserve leftovers for a future occasion. Here’s how to freeze your moist and rich gluten-free chocolate cake:
-
Freezing Cake Layers:
-
After baking and cooling the cake layers completely, wrap each layer tightly with plastic wrap.
-
Then, wrap them in foil or place them in a freezer bag to prevent freezer burn.
-
The cake layers can be stored in the freezer for up to 3 months.
-
When you’re ready to use them, simply thaw the layers at room temperature for 1-2 hours before frosting and serving.
-
-
Freezing Frosted Cake:
-
If you’ve already frosted your cake, you can still freeze it! Place the entire cake in the freezer for 1-2 hours to set the frosting.
-
Once the frosting is firm, wrap the cake tightly in plastic wrap and then foil to prevent any air from getting in.
-
You can freeze the whole frosted cake for up to 3 months.
-
To thaw, remove the cake from the freezer and let it sit in the refrigerator overnight. Afterward, let it come to room temperature for a few hours before serving.
-
-
Freezing Cake Slices:
-
If you have leftover slices, wrap each slice individually in plastic wrap and freeze them in a single layer on a baking sheet.
-
Once they’re frozen solid, transfer the slices to a freezer bag or airtight container for long-term storage.
-
To thaw, let the slices sit at room temperature for 30-60 minutes, or microwave them for about 20-30 seconds on low power to avoid overheating.
-

Final Thoughts on Your Moist and Rich Gluten-Free Chocolate Cake
Making a moist and rich gluten-free chocolate cake is easier than you might think, and the results are always worth the effort. This cake is perfect for any occasion, from birthdays and celebrations to a casual treat to enjoy with a cup of coffee. The combination of simple ingredients, a few expert techniques, and the magic of boiling water ensures that your cake turns out light, fluffy, and incredibly moist.
Whether you serve it with frosting, whipped cream, or a scoop of ice cream, this cake is sure to be a hit with anyone who loves chocolate. And the best part? You don’t have to worry about anyone guessing it’s gluten-free. With its perfect texture and rich flavor, it’s a cake that can be enjoyed by all.
Remember, if you need to make the cake in advance, storing and freezing options allow you to enjoy your cake even longer, without losing any of its deliciousness. So go ahead, bake, enjoy, and share the love with family and friends.
Moist and Rich Gluten-Free Chocolate Cake Recipe Card
Ingredients:
Dry Ingredients:
-
2 cups gluten-free all-purpose flour (with xanthan gum)
-
¾ cup unsweetened cocoa powder
-
2 teaspoons baking powder
-
1 ½ teaspoons baking soda
-
1 teaspoon salt
-
2 cups granulated sugar
Wet Ingredients:
-
1 cup milk (dairy or non-dairy)
-
½ cup vegetable oil (or preferred oil)
-
2 large eggs
-
2 teaspoons vanilla extract
-
1 cup boiling water
Instructions:
-
Preheat the Oven: Preheat your oven to 350°F (175°C). Grease two 9-inch round cake pans with oil and line the bottoms with parchment paper.
-
Mix Dry Ingredients: In a large bowl, whisk together the gluten-free flour, cocoa powder, baking powder, baking soda, salt, and sugar until well combined.
-
Add Wet Ingredients: Add the eggs, milk, oil, and vanilla extract to the dry ingredients. Stir until the mixture is smooth and fully incorporated.
-
Add Boiling Water: With the mixer on low speed, carefully pour in the boiling water. Continue mixing until the batter is smooth. The batter will be thin.
-
Bake the Cake: Divide the batter evenly between the prepared pans. Bake for 30-35 minutes or until a toothpick inserted in the center comes out clean.
-
Cool the Cake: Let the cakes cool in the pans for 10-15 minutes before transferring them to a wire rack to cool completely.
-
Frost and Serve: Once cooled, frost with your favorite frosting (chocolate buttercream, vanilla buttercream, or ganache), then serve and enjoy!
Notes:
-
Dairy-Free Version: Use non-dairy milk and dairy-free butter for the frosting to make the cake fully dairy-free.
-
Freezing: You can freeze the cake layers before frosting. Wrap each layer in plastic wrap and store in the freezer for up to 3 months.
-
Serving Tip: For a lighter touch, serve with whipped cream or a scoop of vanilla ice cream alongside the cake.
Nutritional Facts (per serving):
-
Calories: 320 kcal
-
Carbohydrates: 56g
-
Protein: 4g
-
Fat: 12g
-
Saturated Fat: 8g
-
Cholesterol: 29mg
-
Sodium: 350mg
-
Potassium: 100mg
-
Fiber: 3g
-
Sugar: 39g
Prep Time: 10 minutes
Cook Time: 30-35 minutes
Total Time: 45-50 minutes
Method: Baking
Cuisine: American
Servings: 12
Calories: 320 per serving
Yield: 1 cake (9-inch round, 2 layers)
Moist And Rich Gluten-Free Chocolate Cake
Ingredients
Dry Ingredients:
- 2 cups gluten-free all-purpose flour (with xanthan gum)
- ¾ cup unsweetened cocoa powder
- 2 teaspoons baking powder
- 1 ½ teaspoons baking soda
- 1 teaspoon salt
- 2 cups granulated sugar
Wet Ingredients:
- 1 cup milk (dairy or non-dairy)
- ½ cup vegetable oil (or preferred oil)
- 2 teaspoons vanilla extract
- 1 cup boiling water
Instructions
- Preheat the Oven: Preheat your oven to 350°F (175°C). Grease two 9-inch round cake pans with oil and line the bottoms with parchment paper.
- Mix Dry Ingredients: In a large bowl, whisk together the gluten-free flour, cocoa powder, baking powder, baking soda, salt, and sugar until well combined.
- Add Wet Ingredients: Add the eggs, milk, oil, and vanilla extract to the dry ingredients. Stir until the mixture is smooth and fully incorporated.
- Add Boiling Water: With the mixer on low speed, carefully pour in the boiling water. Continue mixing until the batter is smooth. The batter will be thin.
- Bake the Cake: Divide the batter evenly between the prepared pans. Bake for 30-35 minutes or until a toothpick inserted in the center comes out clean.
- Cool the Cake: Let the cakes cool in the pans for 10-15 minutes before transferring them to a wire rack to cool completely.
- Frost and Serve: Once cooled, frost with your favorite frosting (chocolate buttercream, vanilla buttercream, or ganache), then serve and enjoy!
Notes
-
-
Dairy-Free Version: Use non-dairy milk and dairy-free butter for the frosting to make the cake fully dairy-free.
- Freezing: You can freeze the cake layers before frosting. Wrap each layer in plastic wrap and store in the freezer for up to 3 months.
-
Dairy-Free Version: Use non-dairy milk and dairy-free butter for the frosting to make the cake fully dairy-free.
- Serving Tip: For a lighter touch, serve with whipped cream or a scoop of vanilla ice cream alongside the cake.


